I am drawn to images with beautiful light which is why backlight is a favorite of mine. I have compiled a few tips to help you achieve warmth and beautiful light in your own images.

Introduction to Backlit Portraits
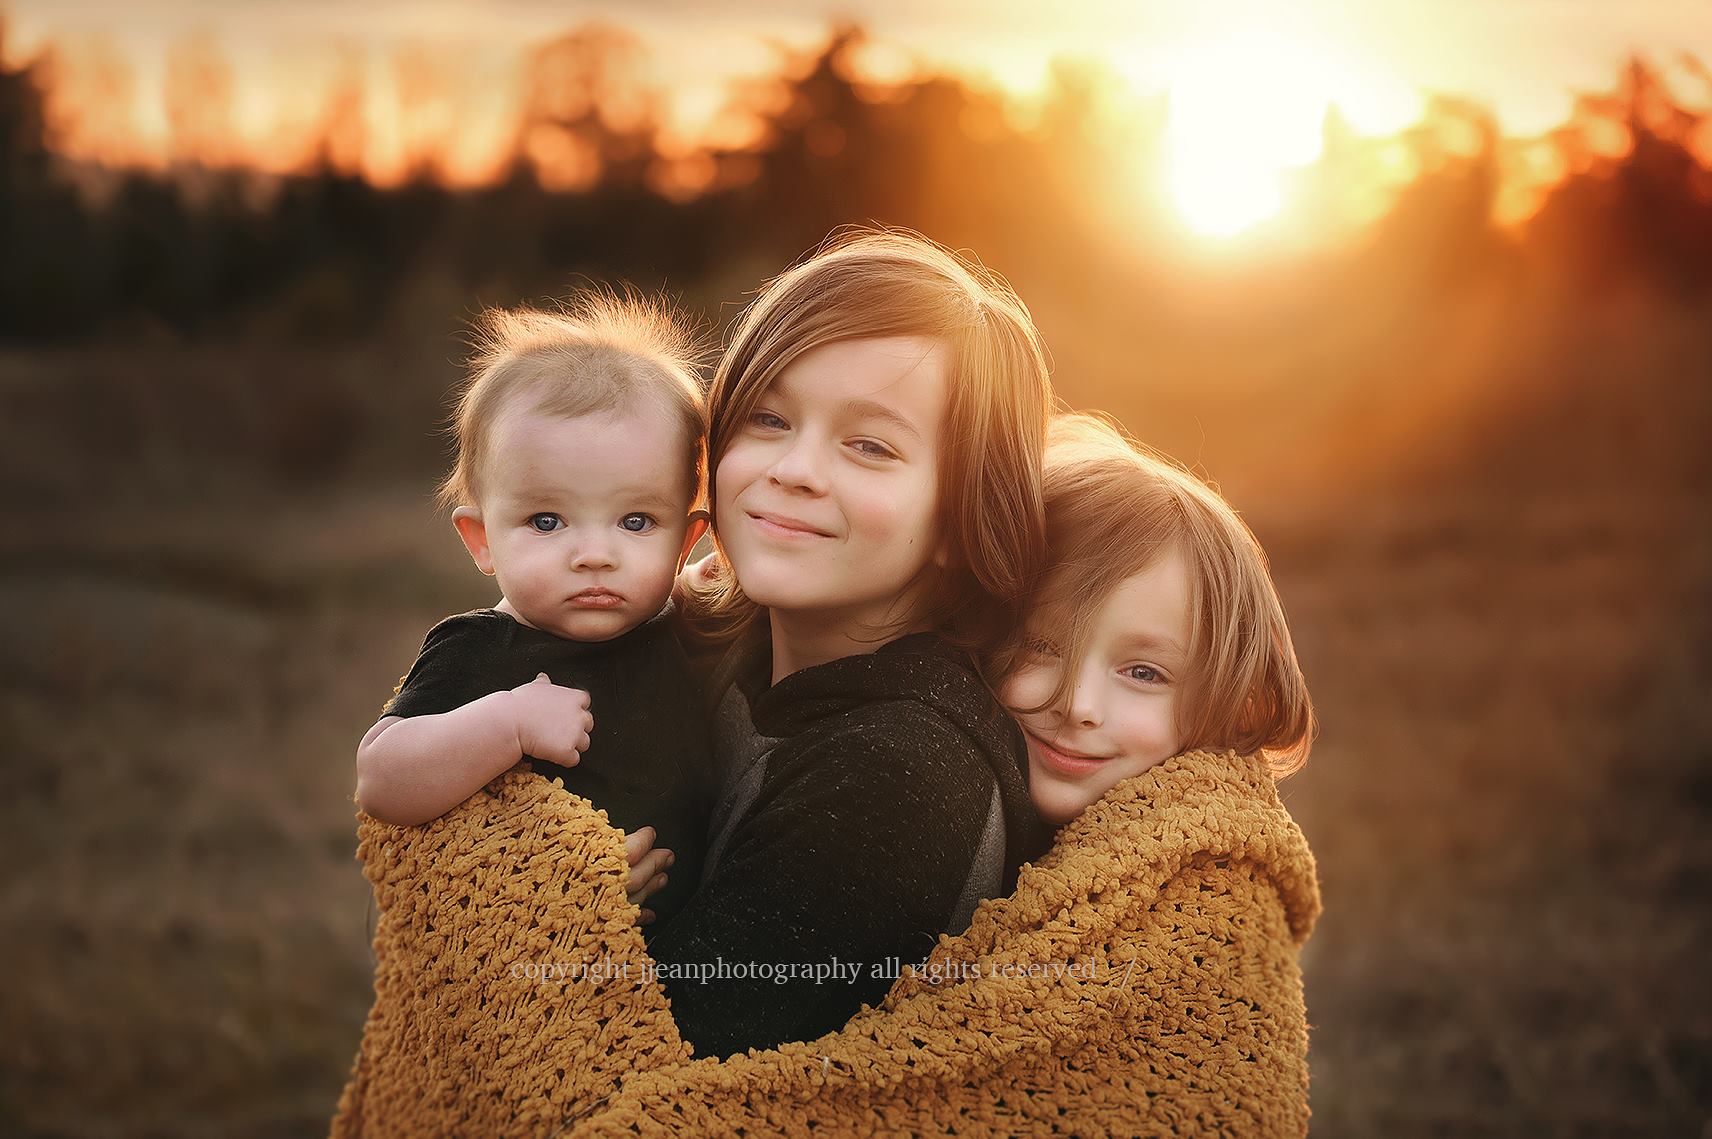
Before shooting in backlight, you definitely need to know what it is. Backlight is when the main source of light is behind your subject. This can be achieved at any time of the day as well as indoors or outdoors (as long as the light source is coming from behind). I will be showing tips for outdoor photography today and sharing some Golden Hour images which are a favorite among many. The Golden Hour is the sweet spot where the sun begins to go down giving you a nice warm glow to your images. Typically, the time to shoot is about an hour before the sun sets.

Utilize Golden Hour Lighting
The best way to achieve good backlighting at any time of the day is to diffuse the light (especially when it is really bright).
Diffusing light means that you are filtering out the light source. For example, this image below was taken early evening where the sun was still high up and very bright. There was a good amount of trees that were providing some shade. I placed my subjects where the light was filtered through the trees, giving them some amazing backlight.

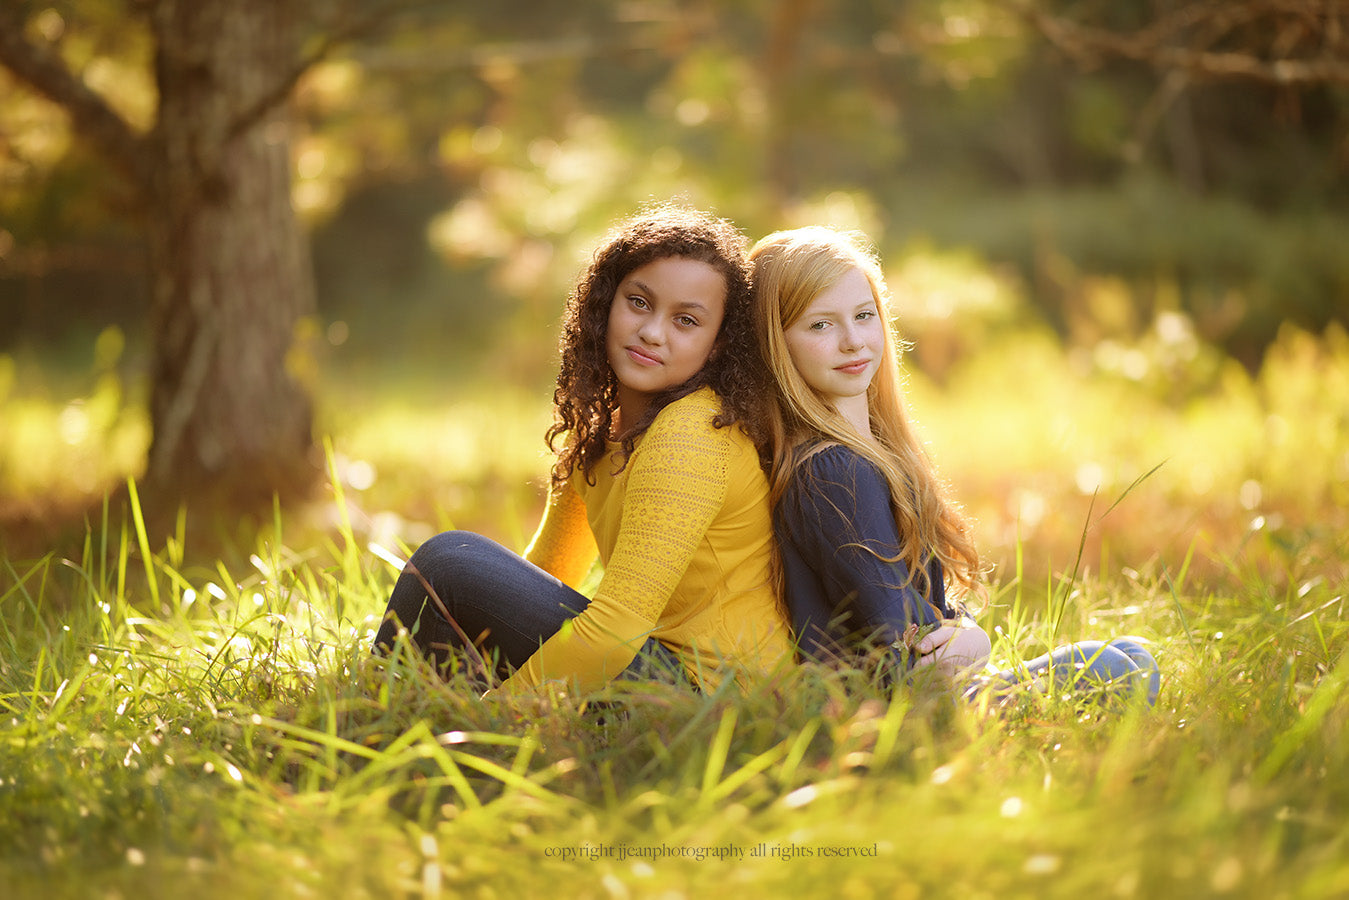
The area in front of them (and behind me) was well lit with an open field, so I was able to get a good exposure on them as well as get some nice catchlights. (the light reflected in the eyes)
If you are in an area where there isn't enough light, I recommend using a reflector to bounce the light on to your subject or you can use a fill flash. On the rare occasion that I do use a flash on my camera, I make sure to point my flash where is it not directly on my subject so the light is more natural looking.
Here are a few more examples of a diffused backlight. (Can range from trees, clouds, buildings, etc)


Adjust Camera Settings for Backlighting
Correct Exposure and Spot Metering for Backlight
Be sure that when you are shooting with backlight, that you are exposing for your subject and not the sky behind them. I typically pick a spot on my subject's face when setting the exposure. If the light behind them is very bright, it is going to blow out the sky/background (making the sky or background very bright which loses detail) which is totally okay. If I have lost my sky by exposing for my subject, then I will sometimes add a sky overlay when I take the image into photoshop to edit. You can see how I do that here.

Compose with the Light Source in Mind
Change Your Angle - Haze, Lensflare, and Contrast
Where you position yourself is very important when shooting in backlight. Your angle determines whether you will have a hazy image, a sharp image with contrast, or an image with a lens flare.
For example, in this first image below, I wanted to get some sun flare. I positioned myself where my subject was blocking most of the light source (the sun), but not all of it.

In the next image, I moved just slightly so I would have less of the sun flare. When I did this, I was able to get less haze in the image (keeping more contrast).

If you like lens flare in images, be sure to get the light source in the frame. These two images below are examples of angling myself where I am getting the light in my lens. (In regards to camera settings, I still made sure to meter off of my subjects rather than the light source)


Be sure to remember that the more light you get in your lens means that there will be more haze. The more the light is diffused or hidden (by your subject), it will result in more contrast and less haze.
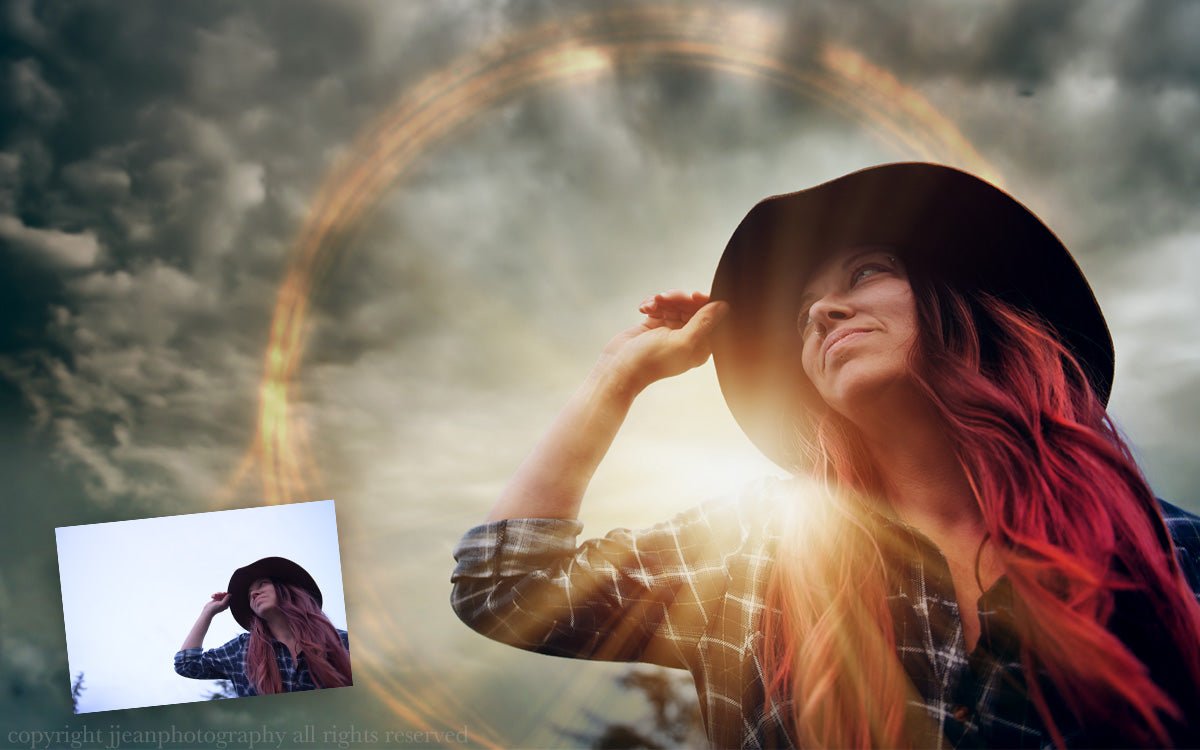
Creating Backlight with Photoshop
I often get asked how to create backlight in photoshop. The best way to a good result is to start with an image that already has a light source coming from behind. If it is a cloudy day, this can work; however, I usually just add a little more light to an image that already has some nice backlighting. This makes it appear more natural.
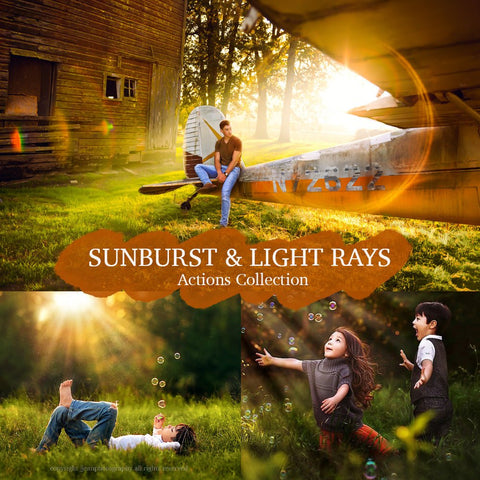
There are many different ways to approach this in Photoshop and Lightroom. One of the tools I use is a gradient which helps create the hazy look. For a quick edit, I use one of my actions from the Sunburst and Light Rays Collection that adds a small amount of light on the top of the image.

Practice Backlight
The best way to get good backlighting is to practice as much as possible so now it is time to get your camera and go out and shoot!

* * * * * * * *
Resources for Adding Light to Your Images
For Lightroom
Lens Flare Presets

Evolve Collection (Golden Light Brush)
LR Light Effects

For Adobe Photoshop Creative Cloud

Light Overlays & Sky Overlays for Adobe Photoshop
Learn How to Edit